

Click on the “+” on the top right to create a new task.
You will be prompted with the following Task Creation window.
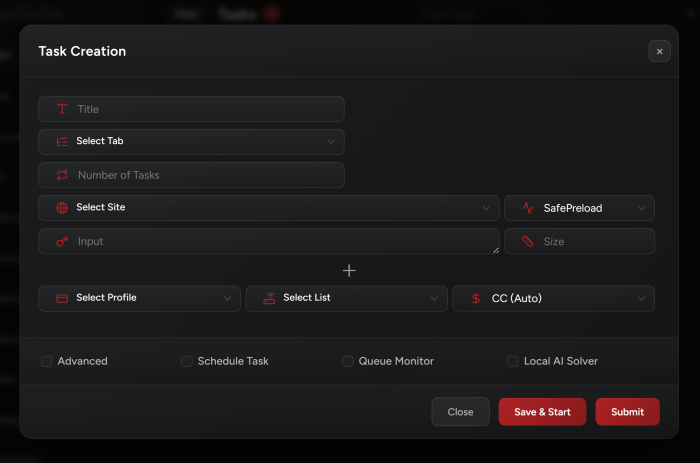
Creating Tasks
1. Select Tab
Choose which task group you want your task to be in.
2. Number of Tasks
Enter the number of tasks you want to create.
3. Select Site
Select the site you want to cop on from the list.
Note: CustomShopify will allow you to pick any site that is Shopify but not found in the list.
4. Size
Select the size you want to cop or type “FA” to get the first available size, “RA” to get a random size, “LA” for last available, or leave empty for a random size.
You can also include multiple sizing by separating them with a -> (6->8), or with a comma (6,6.5,7,7.5,8). In this case, it will select a size randomly from the list instead of in sequence.
Note: When using this format -> , NSB will increment the sizes by 0.5. This means you can’t use this format on items that don’t have 0.5 in the size options.
5. Select Billing Profile & Proxy List
Select your billing profile and proxy list which you have previously set up in Proxies and Billings tabs.
6. Select Payment Method
For some sites, you may specify if you want the task to checkout using your card, PayPal, or other payment methods.
7. Input (Links, Keywords, or Variants)
Links:
In order to use the link, you’ll need to have a product page link.
Keywords:
In order to use keywords, you’ll need to create your own keywords or use the keywords we put out in the release instructions on discord.
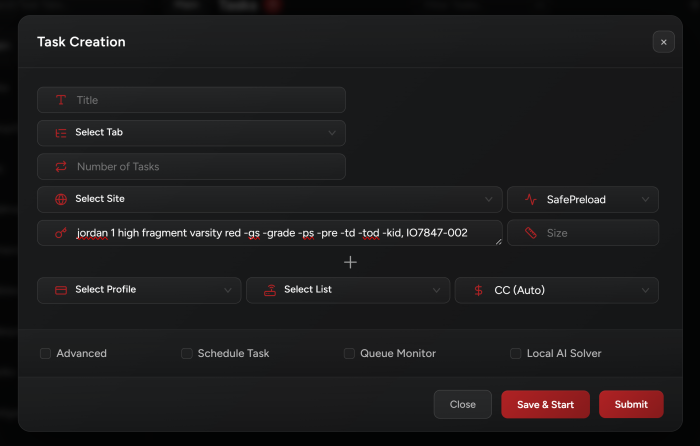
Variants:
It’s a code for a specific shoe and a specific size. You can find that in #variants-els discord channel or in your Cookgroup. You can run multiple variants per task in this format: var1, var2, var3, etc…
Others:
For Adidas, we use a “PID”.
For Nike, we use an “SKU”.
For Asos, we use “Variants”.
SKU and PID refers to a unique item ID, you still have to enter a size.
8. Advanced
Run Task For:
You can choose how long to run your task for to protect your proxies.
Delay:
For experienced coppers, you can create advanced tasks and work around the delay time (Timeout).
The less the timeout, the more frequent it will send requests, the more likely your IP will get banned. However, the better chance you will find the item more quickly.
The more the timeout, the less frequent it will send requests, the less likely your IP will get banned, but you might take a longer time to detect the item.
Pre Drop Delay:
This refers to the delay you want to use close to drop time. You can set a timer where the task, while running, will automatically use a specific delay that you entered (let’s say the release is at 5 PM but I started my tasks at 4 PM with delay of 10 seconds. I want NSB to change the delay to 500 milliseconds at 4:58 PM).
Min Price:
Select a min price limit for your task to not cop anything cheaper.
Max Price:
Select a max price limit for your task to not cop anything expensive.
Coupon:
If you have a coupon code you may enter it here, and you will get a discount on your task total price.
Quantity:
Choose the quantity of items you want to purchase.
Schedule Task:
You can check the box to schedule your tasks to start or stop on a date and time, or make them run on an hourly mark.
Site Specific:
There are some site-specific options when creating a task, for more info about these options, check the guides under Site Specific Guides.
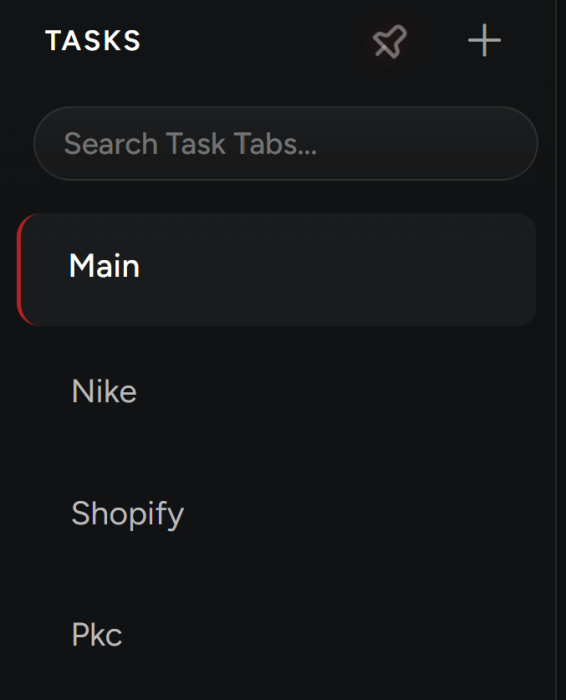
Task Groups
You may create task groups to separate your tasks in different tabs.
The stats can be seen under each tab name once you start your tasks. You can view how many tasks are Running or Sleeping or Entries or ATC or Checkouts.
Additional Features
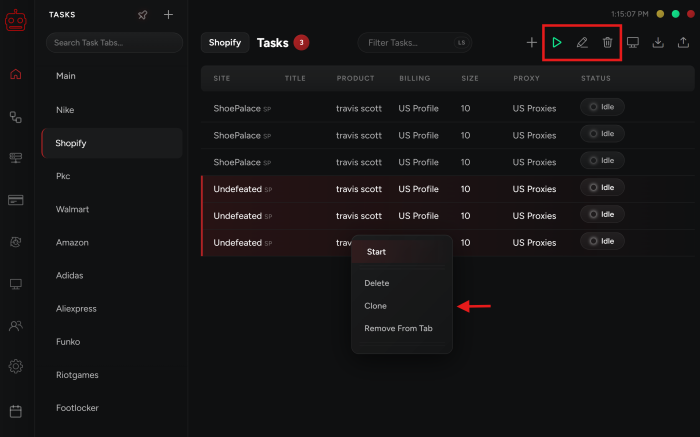
1. Mass Control Tasks
You can control all your tasks at the same time by using any of the options on the top right including: Start All, Stop All, Edit All, or Delete All.
If you would like to control multiple tasks, you can also do that by clicking on ctrl/cmnd and selecting the tasks you want. Then you may right click and Start/Delete/Clone the tasks as shown in the image below.
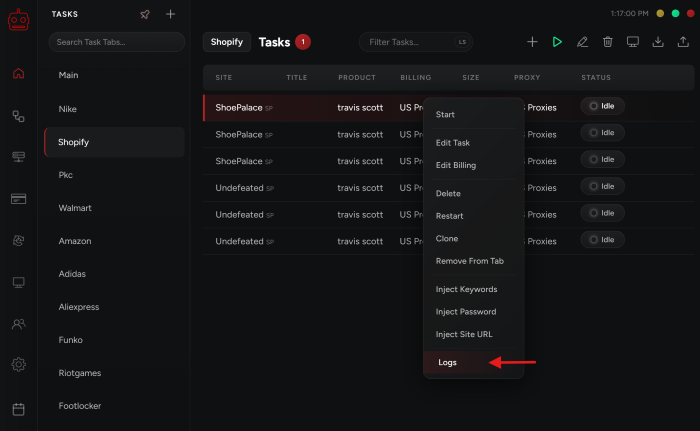
2. Task Logs
Logs are a documentation of the process the task is going through when buying an item. You can find them by right clicking on your task and choosing Logs.
Note that if you close your bot your logs will disappear, so make sure to save them before you do so. That way our team can help you debug them and figure out how you can improve your setup in order to cop.
Post Views: 6